Van Trekker

Checkout my vandwelling blog at http://vantrekker.com/ Thanks for visiting!

Saturday, October 12, 2013

Easy Turtle Soup

On a recent trip, I found a place that sells turtle meat.  After doing some research, I saw a lot of different ways to make turtle soup. Some recipes where "white" while others used a tomato base. 

This simple soup is delicious and warms the belly nicely.  I used lots of black pepper and really enjoyed the slightly spicy kick.


Brad's Turtle Soup

3/4 pound turtle meat (loins work well) cut into bite sized pieces
1   regular sized can of low sodium chicken broth
1   can cream of mushroom soup
3   tablespoons real butter
1   teaspoon minced garlic
4   green onions, diced
2   size "B" red potatoes - sliced as thin as possible
16  ounce bag frozen veggie blend (green beans, carrots, corn)
1   tablespoon Italian seasoning
2   bay leaves
1/4 teaspoon cayenne
1/2 teaspoon ground black pepper
small amount of flour

Pat the turtle meat into the flour to coat.  Discard the flour.

Warm the butter in a large sauce pan.  Brown the meat.  Add the onions and garlic and cook until onions are translucent.  Add chicken broth, cover, and simmer on low for about 30 minutes or until the meat is soft.  Uncover.  Add potatoes and frozen veggies, bay leaves, Italian seasoning, black pepper, and cayenne pepper.  Stir in the cream of mushroom soup.  Cook over low heat for another ten to fifteen minutes, adding milk or cream until soup is desired consistency. 

Wednesday, September 25, 2013

Easy Corn Chower for Camping


Many of the ingredients in this tasty soup can be purchased on a salad bar.  I used fresh sweet corn but you can use frozen or canned.  Fresh is the most flavorful!


Easy Corn Chowder in the Slow Cooker

1 can of condensed cream of potato soup
1/2 cup diced chopped bell peppers (green, yellow, or red)
1/3 cup diced onions
2 tablespoons real bacon bits
1 teaspoon minced garlic
2 tablespoons olive oil (if you use garlic flavored, omit the garlic above)
1 cup of fresh or frozen sweet corn
1 cup milk
1 3oz package of cream cheese, cubed
Fresh ground pepper to taste


In a small crockpot heat the olive oil on the low setting, add the veggies, and cook until they are tender - about an hour.  Add in the remaining ingredients and warm for about another 40 minutes.  Stir to make sure everything is mixed.

Wednesday, July 31, 2013

Tiny No Bake Berry Pies

At just a few inches in diameter, you can enjoy a luscious
berry pie for a mere 159 calories.  They're good for you!


Recently I was out on a berry picking expedition but was only able to gather a small quantity of the desired blackberries.  Thankfully, I found some black raspberries and a few mulberries as well.  The total was not enough to make a full sized pie and then I realized that these tiny pies, made in the little graham cracker crusts, would be just as delicious and simple to make.  With no sugar added to the berries, this recipe is also diabetic friendly.  The idea worked out so well that I wanted to pass it along.


No Bake Fresh Berry Mini Pies

1.5 cups fresh berries such as blackberries, raspberries, or mulberries
1   cup water
1T   quick cooking tapioca
1   pkg sugar free raspberry jello
6 pack of  mini graham cracker crusts (such as Keebler "Ready Crusts")
Spray whipped cream (optional)


Gently wash the berries and dry on a paper towel.  Place them in a sauce pan with the water.  Cook over low heat until gently bubbling.  Stir in the tapioca and then the dry jello.  Continue to stir until slightly thickened.  Remove the pan from the heat and cool for an hour or so but do not let the mixture set up.  Spoon it into the graham cracker crusts.  Chill the pies until completely set and serve with whipped cream.

The following nutrition information calculation INCLUDES 2 tablespoons of the spray type whipped topping.  Take 20 calories off if you don't use the whipped cream.


Sunday, July 28, 2013

Healthy Wheat and Chia Tortillas

A tasty, healthier, homemade tortilla you can make when camping.

I love tortillas.  My Latino friends taught me that tortillas are a staple that are useful far beyond tacos and burritos.  You can't beat their portability and durability.  The problem is that many of the lovely and soft, pillowy tortillas are full of carbohydrates and can spike the blood sugar. 

There are low carb versions out there and they are delicious... But what do you do when you are in the boonies?   You make your own.  All you need is flour, fat, and water.  What if you don't want to carry whole wheat flour?  Do like I do... Just carry one container with a 50/50 blend of white and wheat flours.  Your cooking will be a little healthier and more convenient that way.


Whole chia seeds - available at any healthy food market
They are good for your heart and your digestion.


This recipe uses chia seeds.  Most people have heard of chia from the commercials featuring the fuzzy little green "Chia Pets".  The seeds are healthy, fiber packed, and give you a nice dose of Omega 3.  This recipe incorporates them for a little extra flavor and fiber.  You could skip them and decrease the water to about 3/4 cup or so, but you won't have the same rich flavor.


Linda Ashley, Dietitian
Hy Vee #5, Cedar Rapids
Before posting the recipe, I wanted to introduce you to someone who is a huge inspiration in the quest for eating and living healthier. 

Linda is one of the dietitians at the HyVee grocery stores in Cedar Rapids.  Every time we see each other in the store, we discuss the latest things we've been cooking.  She also conducts helpful classes for various healthy topics including seafood grilling, various garden greens, healthy TV dinners, etc. 

Linda has an enthusiastic personality and is a pleasure to chat with.  She's given me so many tips and enjoys hearing about some of the zany ideas I've come up with that actually work... such as this concoction.

One last note... There's nothing magic about this recipe... Try different add-ins like garlic salt or onion powder.  Change the chia to flax seeds.  You can make the tortillas thick like gorditas or as thin as possible.  If you cook them a short amount of time, the tortillas are soft.  Cook them longer and they are more crunchy, just inviting you to eat 'em up like a tostada with beans, sour cream, and guacamole.  One thing is certain... These have a stronger flavor and are much more filling than their white flour counterparts.  The added fiber is huge bonus.


Wheat and Chia Tortillas

1 cup white flour
1 + 1/4 cups whole wheat flour
2T  Chia seeds (whole or milled)
2T  olive oil (I like to use garlic flavored)
1 + 1/4 cups slightly hot water
1/4 salt (or as desired)
extra flour for kneeding
cooking spray


Mix both flours, salt, and chia seeds together in a bowl.  Add in the olive oil and mix until crumbs are formed.  Stir in the water, mixing until the dough is a slightly gooey ball.  Scoop with 1/4 cup measuring cup, forming eight portions.  Using and extra flour needed, roll into balls and knead each one.  Set aside and let the dough relax for about fifteen minutes or so.

If you don't have a tortilla press, simply coat a skillet with cooking spray and warm the skillet over low heat.   With your fingers, press each tortilla to desired size and shape.  An alternative method is to spray a plate and shape the tortilla, transferring to the skillet.

Cook until you see brown speckles on each side.  If the tortilla gets too tough or thick, don't worry!  You can tear them up and dip them in hummus or guacamole for a tasty snack.

Below is a nutrition analysis I ran on the ingredients.  I hope you enjoy these!  If you make these tortillas, I would recommend doing it while you are camping rather than in advance.  They are better when fresh and are a fun activity!


Take care!

Bradford, the Van Trekker
vantrekker.com

Sunday, July 7, 2013

Easy Berry Smoothie for Camping

Starting with frozen berries, this summer time delight is a treat!

It's those lazy, hazy summer days in Iowa... You know, the kind where everyone is craving ice cream, iced tea, lemonade and such.  I've been longing for something with berries in it and came up with this simple recipe that can be made when camping.  You don't need ice.  Just start with a bag of frozen berries!  I used an Aldi brand mix of raspberries, strawberries, blackberries, and blueberries, along with some low sugar yogurt and a bit of G2 (low calorie) Gatorade.  The result was a tasty antioxidant and protein packed treat.  Enjoy!


No pretty fufu glass here... I was in a hurry to drink it!


VT's Berry Yogurt Camping Smoothie

1.5 cups of frozen mixed berries
1 small container of low sugar flavored blueberry yogurt
3/4 cups fruit punch flavored Gatorade  G2 (or Aldi N2 equivalent)
2 Tablespoons half 'n' half

Blend all together using an immersion blender (or an upright blender).  Serve at once while it is still cold.  The half 'n' half is optional but gives the drink a wonderful texture, color, and taste.  Enjoy!


Wednesday, June 26, 2013

Creamy Crimini Mushroom Pasta


Recently I decided to go on a 2 day camping trip eating only vegetarian (non-vegan) food. It's day 2 and I feel great and have enjoyed the food. Here's a recipe I made up last night for camping.  Don't worry about measuring stuff too closely.  I pretty much only use a 1/4 measuring cup for most cooking efforts (and "pinches" for small measurements)
 
Creamy Crimini Mushroom Pasta

4 whole crimini mushrooms, sliced (you can use other kinds of mushrooms)
1/2 cup dried pasta (I used rainbow rotini)
1 cup chicken broth
1/3 cup sour cream
1/2 cup fresh spinach leaves, torn

1/4 cup white wine (I used cheap Pinot Grigio)
1T olive oil (I like the garlic / herb infused)


Creamy sauce is starting to thicken


Saute the mushrooms in the olive oil for a couple of minutes over low heat. Add in the white wine and simmer over low heat a couple of minutes until the wine starts to be absorbed. Slowly add the chicken broth.  Stir the pasta and simmer until the pasta is nearly cooked (about 7 minutes).  Mix in the sour cream, stir until well mixed and continue to simmer until thickened.  Season as desired.

This simple recipe would be wonderful with chicken, more veggies, you name it.  You could even add in a small amount of dijon mustard!
 
Enjoy.
 
Bradford aka V.T.

Wednesday, June 12, 2013

Potato, Leek and Ham Soup

Potato Leek and Ham Soup w/ a drizzle of half 'n' half


Who says you cannot eat tasty soups during warm weather?  I made up this quick soup this evening in 90 degree weather and it was quite filling.  It uses tiny yellow potatoes and a fresh leek for a creamy, delicious flavor!   If you don't have fresh potatoes, you can add dry flakes (as needed) at the end for a similar result. 

So what does it taste like?  Sort of like a smooth potato soup with a light onion flavor.  Wouldn't it  be nice to add a little corn in there, too?


This recipe makes 3-4 servings.


Creamy Potato, Leek, and Ham Soup

1 can low sodium chicken broth
1 leek (white and light green parts), chopped
6 small (size B) yellow potatoes
1/4 cup shredded carrots
1 clove garlic
1/4 cup (plus or minus) of half and half
1/2 cup of ham strips (from salad bar)

Place all except for half and half into a 2 quart crock pot.  Cook on low for 4-5 hours.  Mix with an immersion (or conventional) blender, adding the half 'n' half until smooth.  Season with salt and fresh ground pepper, if desired.

Wednesday, June 5, 2013

Easy Hummus for Campers

With few ingredients, why spend a lot of money when
a buck will get you a BIG serving of tasty hummus?


One of the friends of the sister blog (vantrekker.blogspot.com) left a comment and asked about making hummus with an immersion blender.  I tried last night and liked the results.  The first batch was a little thin so let me make a couple of suggestions...

Don't use all of the bean liquid.  Reserve some and add into the hummus as needed.

  • Use a DEEP container.  I had bits of chickpeas on me, the walls, the bed, etc. in the camper van as a result of the blending process.  I'd recommend using something like a malt cup.

  • This one is a little bit difficult to blend.  It will take you a while to mix or you can always blend it in batches and combine them.


Easy Camper's Hummus

1 can of chickpeas (reserving liquid)
2 teaspoons of your favorite olive oil
2 teaspoons of cumin
1 teaspoon of hot pepper oil (optional, of course!)
Hot pepper flakes (if desired)
Fresh ground pepper (if desired)

Reserve the bean liquid.  Place the chickpeas and oil(s) into a container for blending.  Start the blending process, adding in the bean liquid to achieve the desired texture.  Add the spices, too.  I like using a little hot oil for extra flavor.  This is a fairly bland product, so season, season, season!

Have fun!

Bradford, the "Van Trekker"

Crock Pot Asparagus and Cheddar Soup

Though not the prettiest of soups, this fresh asparagus and
cheddar soup is easy to make, flexible, and tastes great!


I recently bought a Cuisinart immersion (stick-type) blender.  The plan was to try and come up with some soups that are tasty and have fewer carbs.  This recipe was an experiment which turned out to be delightful.  It's light texture and flavors make it almost a restaurant quality item.  The best part is that you can customize it any way you like with great results.

One of these blenders is a huge
helpfor the camping chef.


I cooked this batch while fishing and finished it up just before dinner.  What a treat!


VT's Asparagus and Cheddar Soup

1 lb asparagus, chopped into convenient pieces (1/2 to 1 inch)
1 bunch of green onions, chopped into convenient sized pieces
1 can reduced sodium chicken broth
1/4 cup of half-n-half (plus or minus)
3T butter
2-3 slices of medium cheddar cheese  (maybe a half cup or so of shredded?)
A few red pepper flakes (or ground black pepper)
1 clove of chopped garlic (or use garlic salt to taste)

Method:

Pour the broth into a 2 quart crock pot.  Add the onions and asparagus (and garlic if using fresh).  Cover and cook on low for about 4-5 hours or until the asparagus is soft.  Add in the butter and part of the half-n-half.  Blend with an immersion (stick) blender until very smooth.  Tear up the cheese into small pieces, adding to the soup and blending until smooth.  Add more cheese or half-n-half as desired and season however you like.  Even more cheese would be nice, too!

Serve hot.  If you also have a "warm" position on your slow cooker, this soup will stay warm a long time.  Just don't put the half-n-half and cheese in at the beginning.  The heat of cooking will damage the proteins and affect the flavor and consistency.

Note - if the soup is too thin, you can thicken it with flour or potato flakes - just blend it in!

Thursday, April 11, 2013

Mini Pineapple Upside Down Cakes Made Easy

Who can't resist a pineapple upside down cake?

First of all, thanks to our friend "Tinycamper" who encouraged me to get this posted.  It was one I enjoyed making!  :)

Note:  Ths was baked in mini pie tins.  If you want the cake to be prettier, a large muffin tin or small cake pan might make something that looks more aesthetically pleasing.  Truthfully, it didn't last that long!


In creating this simple little camping recipe, the goal was to make it healthier (for diabetics) as well as a more decadent version.  I did the diabetic thing first and it was okay... but it became imperative to make a more indulgent iteration for those who love brown sugar.

I also tailored the recipe to use exactly one snack cup of pineapple as well as some pilfered condiments.  You can't beat convenience.  By the way, the cherry in the picture at the top came from another snack cup - a mixed fruit variety.  The cake mix was an el-cheapo Jiffy yellow mix (79 cents).  Why re-invent the wheel?  I'm living in a van.  Scratch cooking is not always an option!

This recipe uses half 'n' half.  Why?  I switched it for the oil 'cause in addition to adding some fat (like the oil does), it also makes the batter deliciously creamy!

Here's the kicker... Total cost was (including pilfered condiments) a little over a buck!  It makes two nice little cakes.  Ya can't beat that!

Here is the decadent version.  The diabetic suggestions will follow.


V.T.'s Camping Pineapple Upside Down Cakes

Bottom:
1 - 4 ounce snack cup of pineapple in its own juice (SAVE the juice!)
4-5 teaspoons butter (4 pats of "snitched butter")
2 Tablespoons brown sugar


Cake Batter:

Remaining pineapple juice
12 Tablespoons (equals 3/4 cup) of yellow cake mix (I used Jiffy 'cause they are cheap!)
2   Tablespoons of egg substitute (such as Egg Beaters)
2   Tablespoons of half 'n' half (two "snitched" refrigerated coffee creamers!)


Method:

First, spray two mini pie tins with cooking spray.  This is important or the cake might stick - even in non-stick cookware.  Drop the butter in the bottoms of two mini pie pans. Place into a preheated 350 degree oven (or toaster oven) for just a couple of minutes to help melt the butter a bit.  Remove from oven.  Sprinkle with brown sugar (1T in each tin).  Top with drained pineapple (about 1T in each tin).  Set aside.

Mix the batter by starting with the leftover pineapple juice.  Mix in the half 'n' half, egg substitute, and then the cake mix.  Beat well.  Distribute evenly between the two cake tins.  Bake at 350 degrees (about 20 - 25 minutes) until the top is set.  You can do the toothpick test, too.


Diabetic version (pineapple at the bottom!)


DIABETIC SUGGESTIONS: 

  • Cut the brown sugar to 1 teaspoon for each cake
  • Cut the butter to 1 teaspoon for each cake
  • Cut the half 'n' half to one creamer for the whole batch
  • Cut the cake mix powder to 9 tablespoons  (reduce the egg substitute to 1T)
The diabetic product is lower in sugar and not as pretty to look at but still tastes great!

Enjoy!

Saturday, March 30, 2013

Crab Quiches - Lower in Fat, Very Convenient!

Real men don't eat quiche?  Nobody told my tomcat!


There is a reason I named that cat "Jesse James".  I went to get the camera and he went for the quiche.  I caught him before any damage was done.  Yes, a bunch went into his bowl and he ate it!  I took it as a compliment.  :)


A small casserole - just right for two or one hungry guy!
 
 
This yummy food got a bad rap thanks to a book called "Real Men Don't Eat Quiche".   I wonder how many people the book scared away... Quiche is just a sort of baked omelet in a pie crust... There's nothing effeminate about that!  What guy doesn't like a big old fried up pile of eggs with everything but the kitchen sink?
 

Quiche in a small pie tin
for a perfect breakfast treat!
For the next camping trip, I decided that cooking just isn't a priority but home cooked food will be.  There will be the usual fried trout and such but I decided to make up some goodies in advance.  Quiches would be perfect because they freeze well and with the vacuum sealer, I could make up a half dozen in advance.

The challenge was to use an egg substitute (generic egg beaters) to lower the fat content.  The half 'n' half used in the first test was actually pilfered coffee creamers from McDonalds.  The mayonnaise used in the recipe came in the form of packets leftover from a trip to Chick-Fil-A.  Yeah, I'm kind of a condiment klepto...  Just remember one packet of mayo or 1 coffee creamer are each 1T.  Who needs to measure?
 
So here's the recipe that Mr. Jesse risked his life trying to steal...  It turned out pretty good!
 
Crab Camping Quiche
Pie crust (see below)
1 C egg beaters or equivalent eggs
6-8 ounces of the GOOD lump crab meat from the refrigerated section (pouch or canned)
1/2 C fontina cheese, shredded
1/2 C mild cheddar cheese shredded
1/2 C half and half (8 coffee creamers)
3T light mayonnaise (3 packets if you snitch them)
1/2t Old Bay seasoning
1/2C chopped green onions (and green parts, too!)
1/2t garlic salt
pepper to taste
 
optional - 1/4 imitation crab meat to decorate top
 
 
Directions:
 
Press the pie crust into small pie tins or casseroles.  This recipe makes enough for 4 small pie tins or 2 small pie tins and one small casserole.  Pre-bake the pie crusts for about 6 minutes at 350 degrees.
 
Mix the half-n-half, egg substitute, mayo, cheeses, veggies, and seasoning together.  Add in the crab meat and mix well.  Divide and pour into the pie crusts.  Decorate with imitation crab meat and more green onions if desired.
 
Bake at 325 to 350 degrees until top is set and a toothpick comes out clean (times can vary but mine took about 20 minutes).  If you use egg substitute, you might get a very high dome on your quiche.  That's okay, it will deflate as it cools off.
 
There are so many things you can do with quiche.  I plan to make more tomorrow, substituting ham for the crab.  Good stuff! 
 
A note about the egg beaters... You can use real eggs if you like.  You will end up with a better product but at the expense of a few extra fat grams. 
 
Enjoy! 


Low Sugar Banana Coconut Cream Dessert


I was in need of some kind of a dessert for camping.  My dear friend, an African-American beauty named Alothina (I wish I was 25 years younger!), introduced me to the rich banana pudding dessert her family enjoys.  I loved it!  But my blood sugar went through the roof!  That's why I came up with this original but very simple coconut banana pudding that is about as close to "sin free" as you can get!


Low Sugar Banana Coconut Cream Dessert

18 vanilla wafers (+ or -)
1 package SUGAR FREE instant banana cream pudding
1 + 3/4 cups 1% milk
1 banana, sliced
1 single serving container of coconut flavored Greek style yogurt

In a small bowl (such as one of those throw-away type plastic bowls), spread a layer of Nilla Wafer cookies.  In a separate bowl, mix the pudding mix, Greek yogurt and milk a few minutes until thickened.  Spread some over the cookies, top with bananas, spread a little more pudding, etc.  If possible, end with the pudding covering the bananas so the air doesn't make the fruit turn brown.

Refrigerate overnight.  You can serve with whipped cream and/or sweetened coconut but it really doesn't need it.

Enjoy!  This recipe works great for a treat for camping.  Why did I use Greek yogurt?  It helps counteract the sugar in the cookies.

V.T.


Thursday, March 14, 2013

Corned Beef and Brussels Sprouts


I know this post is going up a few days early, but I wanted to post it prior to the big event.  Happy Saint Patrick's Day!  In honor of the occasion, I created a special recipe - corned beef and cabbage in the van using Brussels sprouts for the cabbage.  Also, this recipe calls for deli corned beef.  Go to your local grocery store deli and have them slice the meat quite thick.

Enjoy!  One piece of advice... Make this up a bit in advance.  It's one of those "the longer it sits, the better it gits" kind of recipes.  I would strongly urge you to plan on up to 9 or so hours of cooking time on the slow cooker setting of "LOW"...  The flavors mix well and the potatoes will nearly melt in your mouth!


Cooked in a 2 qt. slow cooker, you can't beat this St. Patty's day treat!


VT's Slow Cooker Corned Beef and Brussels Sprouts

12 ounce bottle of beer (I used Blue Moon and bought an extra for the cook!)
3    cloves of garlic chopped
1/4  teaspoon coarsely ground black pepper
1/4  teaspoon salt
20   Brussels sprouts with tough ends cut off
12   baby carrots
5    size B potatoes, quartered (I used three red and two yellow, each about the size of a lemon)
1/2C chopped onions
2T   olive oil (to add a little fat and flavor)
16 ounces (or more) of thick-sliced deli corned beef (3/8" inch or about 1 cm thickness)


Pour the beer into the crock pot.  Set the corned beef aside.  Add the rest of the ingredients except for the meat.  Cook on low for about 5-7 hours until the veggies are starting to get tender.  Cut the corned beef slices into 1/2" chunks and add to the veggies.  Stir, re-cover, and continue to cook on low until the veggies are tender.  I let this batch simmer for about 9 hours on "LOW" and left it on the warm setting (about 160 or so degrees) another five hours!

This recipe didn't need much extra salt.  The corned beef has plenty already.  Also, the beer added a lot of extra flavor as well.


Thanks for visiting!

Bradford, the "Van Trekker"


Sunday, March 3, 2013

VT's Crock Pot Rabbit Stew

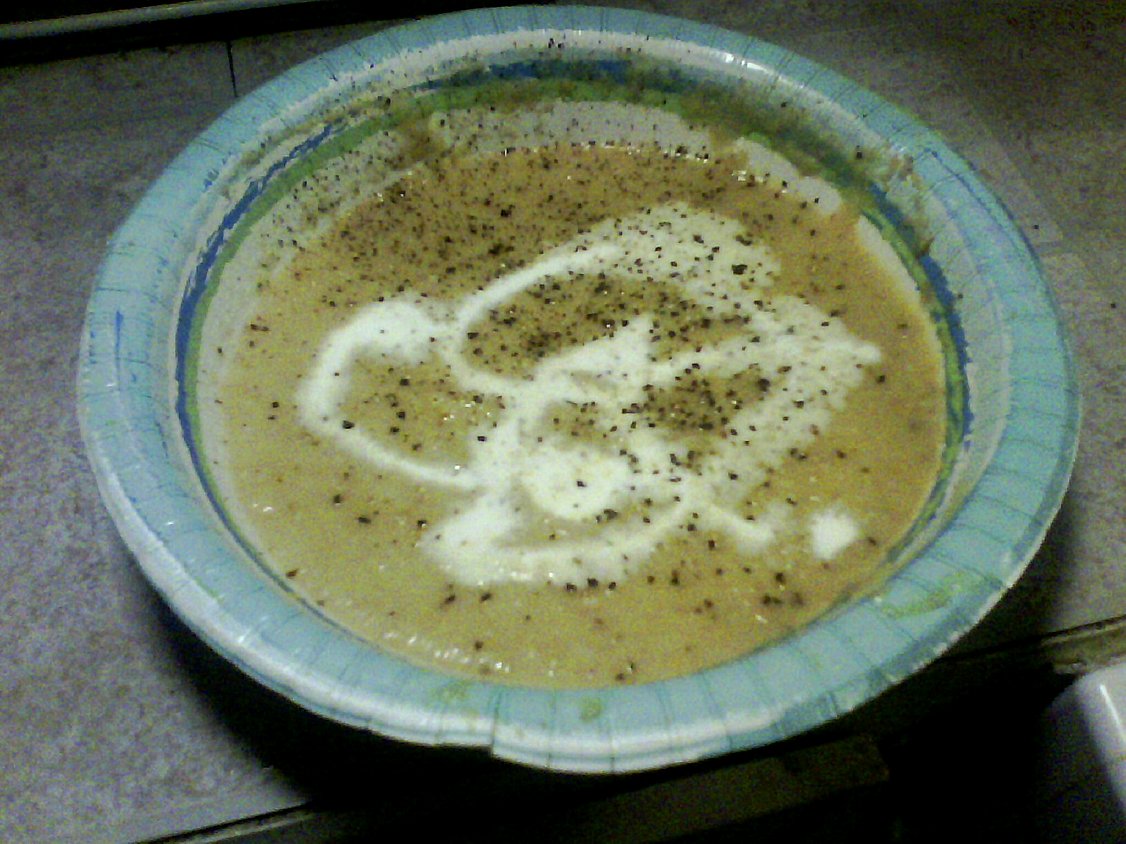
This hearty stew was cooked in a van using readily available salad bar items


*** Note -  Don't be put off by the list of ingredients.  Many of them are things a person will often carry with him/her while traveling.  You can also use dehydrated onions and garlic.  The veggies can be purchased ready-to-cook from a grocery store salad bar for a very low cost. ***
 
With Easter coming and all, I had bunnies on the mind.  Everywhere I went, the seasonal aisles were filled with adorable cotton tailed friends toting baskets of candy.  But there is also a dark side to my psyche...  When I see cute little fuzzy wild creatures, the caveman comes out! 
 
While shopping at Nelson's Meat Market in Cedar Rapids, I made a discovery that I knew would breathe some life into the van cooking efforts... They have the most wonderful farm raised, already cleaned rabbits! 
 
I have to reminisce for just a minute.  The last rabbit I ate was on Thanksgiving day, 1994.  I was heading for Elk Creek park (pronounced by some Iowans as "Elk Crick") to do some trout fishing.  A cute little bunny ran out in front of me and I mowed him down with my 1978 Pontiac Catalina.  Wow, that was a lonnnng time ago!  (That rabbit so SO good back then!)


A rabbit is just the right size for a little two quart crock pot stew.  Add a a biscuit or two and you'll have a couple of meals fit for a king!
 
Note - you can either cook and debone the rabbit beforehand which will reduce the prep and cooking times - or you can cook it with the bone-in.  I chose the bone-in method.  You get more flavor leaving the bones to cook down in the stew.  You'll have to carefully pick them out as you eat the end result.
 
So here is the recipe for VT's Crock Pot Rabbit Stew... I hope you enjoy it as much as Mr. Jesse and I.


VT's Crock Pot Rabbit Stew
 
1 rabbit (roughly 2 lbs)
8 mini yellow Dutch potatoes with skin on (or buy some small potatoes and cut them up)
10 small baby carrots *
10 cherry tomatoes *
10 "salad bar" strips of green bell pepper (about 1/3" x 2.5") *
1/2 cup chopped onions *
1/2 cup white mushrooms sliced in half *
1   cup beef broth
3/4 cup of red wine such as Cabernet Sauvignon (and a glass for the cook, too!)
2 cloves of garlic, chopped
2 teaspoons Italian seasoning
2 bay leaves
salt and pepper to taste
1 packet of brown gravy mix (the cheap stuff)
flour, corn starch or fine bread crumbs for thickening
 
* = items from the salad bar


Directions for cooking with a raw bunny....
 
Butcher and separate the pieces like you would a chicken.  Layer the pieces in the crockpot with the potatoes, carrots, cherry tomatoes, green peppers, onions, mushrooms, and garlic.  There is nothing magic about the proportions or types of veggies.  I got all of mine from the grocery store salad bar!
 
Add the Italian seasoning and bay leaves.  Then pour in the beef broth and red wine.  Cover and let simmer around six hours on low.  You can probably cut the time in half if the rabbit is precooked and deboned.  Discard the bay leaves when you finish cooking.
 
Pull everything out of the crock pot and then thicken the gravy with a brown gravy packet and add whatever other thickening is needed:  a bit of flour or corn starch paste or, if you don't mind the consistency, some fine bread crumbs.  (I used Italian seasoned bread crumbs, then beat the tar out of the mixture, and it became a wonderfully rich, smooth gravy)
 
There was enough salt in the gravy packet that I didn't have to add any extra.
 
The best part of this recipe is that you can do anything you want with it... It's almost impossible to mess up.  Have fun at the salad bar!
 
The most difficulty I had was sleeping as the crock pot simmered away, filling the van with the most delicious aromas.
 
Thanks for reading!  Have fun...

Bradford aka the "Van Trekker"


Wednesday, February 6, 2013

Curried Chicken Salad with Walnuts and Cranberries

A Healthier Version of Chicken Salad using Greek yogurt...
 
 
Oh, how I love chicken salad, particularly the kind with grapes and cashews!  But all that goopy mayonnaise is not good for you.  That's why I decided to come up with something easy to make when camping that won't stop up the arteries.  One note... this recipe uses packets of ingredients.  Yes, I'm a condiment klepto!  Some of these ingredients were "extras" after visiting a Chick-Fil-A location. 
 
If you try this recipe, go easy on the curry until you find the right flavor....  I would encourage adding more fruit, too, if desired.
 
VT's Curried Chicken Salad with Walnuts and Cranberries
 
 
2 cups of cooked shredded or diced chicken (you can use salad bar strips)
1 container (about 6 ounces) of plain, nonfat Greek yogurt
1/3 cup light mayo (6 packets)
1 Tablespoon honey (3 packets)
1/3 Cup chopped walnuts
1/3 Cup craisins (dried cranberries)
1/3 cup chopped red onions
1 Tablespoon (or more) of chopped, fresh cilantro
1 Tablespoon (more or less to taste) curry powder
 
This recipe makes about four servings.
 
Method:
 
Combine the Greek yogurt, mayo, honey, and curry powder.  After well combined, add the rest.  Let the flavors blend for 24 hours, if possible.  Scoop onto a lettuce leave or eat in your favorite sandwich.  If using "Madras" brand curry, I would use more.  I used "Deep" brand and it was very spicy.   Enjoy!